Woodworker's Journal 2004 Summer, страница 56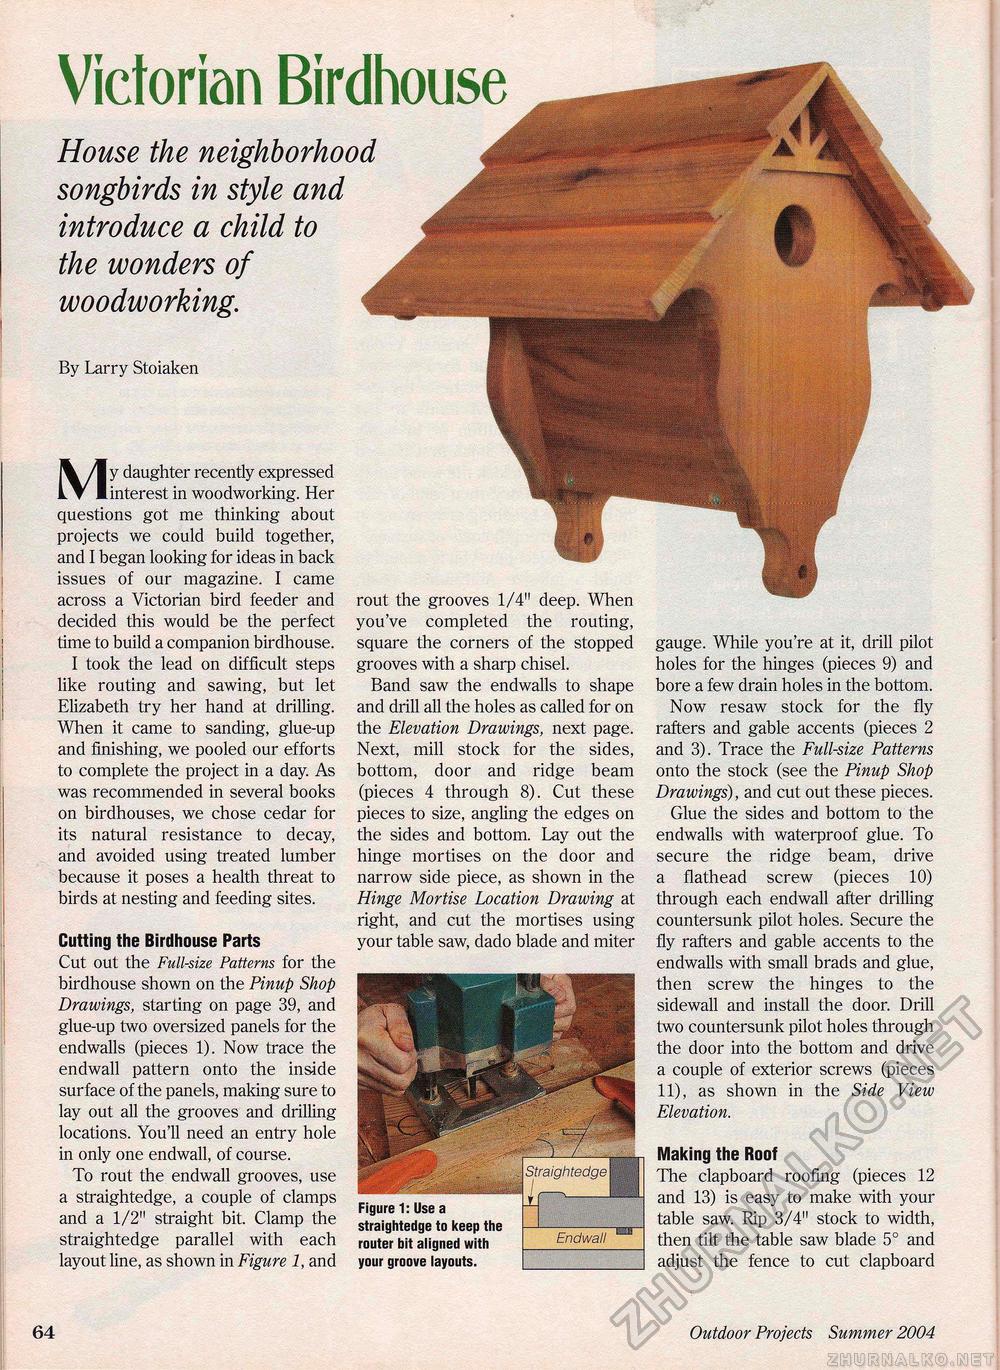
Victorian Birdhouse House the neighborhood songbirds in style and introduce a child to the wonders of woodworking. By Larry Stoiaken IV /I y daughter recently expressed L T 1 interest in woodworking. Her questions got me thinking about projects we could build together, and I began looking for ideas in back issues of our magazine. I came across a Victorian bird feeder and decided this would be the perfect time to build a companion birdhouse. I took the lead on difficult steps like routing and sawing, but let Elizabeth try her hand at drilling. When it came to sanding, glue-up and finishing, we pooled our efforts to complete the project in a day. As was recommended in several books on birdhouses, we chose cedar for its natural resistance to decay, and avoided using treated lumber because it poses a health threat to birds at nesting and feeding sites. Cutting the Birdhouse Parts Cut out the Full-size Patterns for the birdhouse shown on the Pinup Shop Drawings, starting on page 39, and glue-up two oversized panels for the endwalls (pieces 1). Now trace the endwall pattern onto the inside surface of the panels, making sure to lay out all the grooves and drilling locations. You'll need an entry hole in only one endwall, of course. To rout the endwall grooves, use a straightedge, a couple of clamps and a 1/2" straight bit. Clamp the straightedge parallel with each layout line, as shown in Figure 1, and rout the grooves 1/4" deep. When you've completed the routing, square the corners of the stopped grooves with a sharp chisel. Band saw the endwalls to shape and drill all the holes as called for on the Elevation Drawings, next page. Next, mill stock for the sides, bottom, door and ridge beam (pieces 4 through 8). Cut these pieces to size, angling the edges on the sides and bottom. Lay out the hinge mortises on the door and narrow side piece, as shown in the Hinge Mortise Location Drawing at right, and cut the mortises using your table saw, dado blade and miter Figure 1: Use a straightedge to keep the router bit aligned with your groove layouts. gauge. While you're at it, drill pilot holes for the hinges (pieces 9) and bore a few drain holes in the bottom. Now resaw stock for the fly rafters and gable accents (pieces 2 and 3). Trace the Full-size Patterns onto the stock (see the Pinup Shop Drawings), and cut out these pieces. Glue the sides and bottom to the endwalls with waterproof glue. To secure the ridge beam, drive a flathead screw (pieces 10) through each endwall after drilling countersunk pilot holes. Secure the fly rafters and gable accents to the endwalls with small brads and glue, then screw the hinges to the sidewall and install the door. Drill two countersunk pilot holes through the door into the bottom and drive a couple of exterior screws (pieces 11), as shown in the Side View Elevation. Making the Roof The clapboard roofing (pieces 12 and 13) is easy to make with your table saw. Rip 3/4" stock to width, then tilt the table saw blade 5° and adjust the fence to cut clapboard 64 Outdoor Projects Summer 2004 £ |


